Showing posts with label tutorial. Show all posts

November 20, 2012

tutorial: back-to-school pant

Bringing home a tutorial I posted over on MellySews this summer, as part of her Sew in Tune Series. I didn't have to pick a song for this series, because Wheels on the Bus was the only option. To say my almost three year old loves this song is simply an understatement. Obsessed might be a better suited adjective, an ongoing almost two year infatuation. When he was barely one he would wave his little finger in the air in a circular motion wanting us to sing it to him. Pretty sure there is not a day in the last almost two years that I haven't sung this song, usually multiple times in a row!

So here is an outfit that was inspired by the Wheels on the Bus obsession. 
These pants are perfect for the time of year, allowing for cropped pants in the last weeks of summer and then longer pants as we roll into fall. The t-shirt was made using the Raglan Tee Pattern from Sewing for Boys. The vest was a random request from Mae, who loves the alligator print of the lining. You can read more about the vest HERE
To make your own back-to-school pants start by choosing your favorite pant pattern. I chose to use the flat front pant pattern from Dana of Made. I had created another pair of pants to use for this tutorial from a recent Ottobre issue but the legs were skinny, too skinny for any kind of cuff. So when choosing a pant pattern make sure the leg opening has plenty of room for cuffs.

MAKING THE CUFFS
Shorten pant pattern piece to account for no hem needed.  I use a two inch hem for these pants so I cut off 1 1/2  inches, leaving a half inch for the cuff seam.
Use pant pattern piece to cut out cuffs. I decided to make mine 8 inches tall but depending on the size of your child you may need a different height. Remember there will be an inch lost to seam allowances.
Place cuffs on legs, right sides together, and sew 1/2 inch seam. 
Fold down top of cuff 1/2 inch and press. 
Turn cuff to inside of pant leg and press. Press so that the cuff fabric is completely hidden by the pant leg.
Repeat steps above for other three legs of pant. 

Now you should be able to put pant together per your pant pattern. A couple things:

When sewing legs together make sure seam allowance gets sewn facing the pant leg. 
Once pants are complete, blind stitch the cuff to inside of pant. 

MAKING THE TABS
Cut out two rectangles for each tab. Mine were 1 3/4 x 4 1/2 inches. Just make sure they are shorter than the height of the cuff so they won't hang out the bottom of the pant.
Sew 1/4 inch seam around three sides.
Clip corners and turn right side out. 
Top stitch three sides and serge last side. 
Sew button hole. 
Pin tab to inside of pant leg, above cuff, and sew in place.
Sew button on outside of pant leg. I sewed the button right on top of where I sewed the tab to the pant. This helps hide the stitching under the button.
Button the tab and you have cropped pants to enjoy for the last weeks of summer. Or wear them long for back-to-school pants come this fall.

November 19, 2012

oh hi


Long time no see.

Super excited to be back and stoked to be guest posting at Project Run and Play.

Come say hi....HERE.

October 10, 2012

kcwc day 3


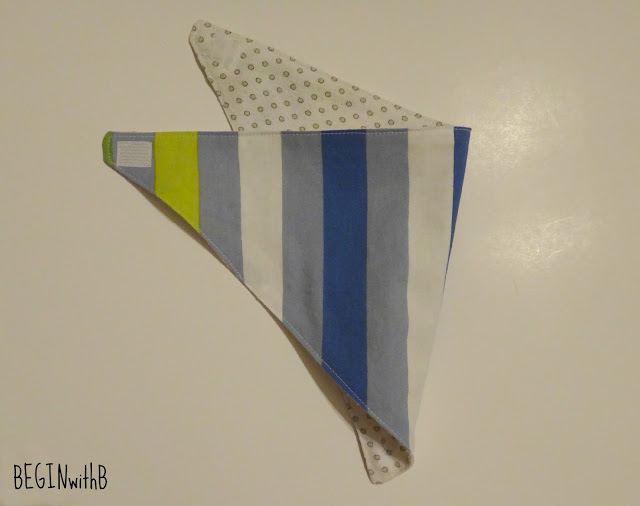
Case wears a bandana everyday. Seriously. Usually more than one a day.  This kid drools more than any kid I know!  So I drafted a quick pattern to make him some more and thought I would share.


Create your own pattern using the diagram below. 
Cut out two pieces, one front and one back. I usually use flannel on the back for better absorption. 
Place pieces right sides together and sew around outside with a 1/4 inch seam, leaving an inch gap for turning. Clip corners.
Turn right side out and press then sew all the way around very close to the edge. Ensure you close the gap as you sew.
Attach a snap or sew on velcro.
Make a few more. 
Done!

August 8, 2012

Sew in Tune

I'm over at MellySews today posting my back-to-school look as part of her Sew in Tune series.


Head over HERE and check it out!

July 27, 2012

tutorial: ruched side skirt


Posting over on Project Run & Play today for Skirting the Issue, a very good cause! Hoping to find a local agency to donate these 4 skirts to so they can go to local foster children. 
Designing for teenage girls I wanted this to be a more form fitting skirt but still wanted the ability to pull on easily. With this idea in mind I measured my model at the widest part of her hips, which I believe is technically called her 'low hip measurement'. I then added an inch for wiggle room and five inches for seam allowances. Then divide by two for the width of each rectangle.

An equation may be easier:
(low hip measurement + 6 inches) ÷ 2 = width of rectangle


For the height of the rectangle I used the knee length measurement from these size charts.

Cut two of these rectangles, front and back. 


MAKE THE SKIRT:
Hem both rectangular pieces. Fold 1/4 inch and iron. Fold another 1/4 inch and iron then sew hem. (If you want you could serge and then iron and hem.) I chose to sew two parallel lines to mimic a double needle hem.
Place right sides together and pin. Make sure when you pin that you line up the hem lines on both sides. Notice my pins are set pretty far back in my fabric since the next seam is 1 1/4 inches wide.
Sew both sides with 1 1/4 inch seam allowance. Make sure to slowly back stitch on top of the hem to secure.
Iron side seam open.
Fold each side of seam under 1/2 inch and iron. 
Edge stitch each side. Make sure to slowly back stitch again on top of hem. These will be the tunnels for your ribbon to create the ruching.
Repeat previous 3 steps with other side seam.


Insert ribbon into tunnels.  Use a safety pin on the end of the ribbon to help feed through tunnels. Start at the hem and up to the waist band and then back down to the hem again. Trim ribbon to leave 4 inches or so and use fray check on each end.

MAKE THE WAISTBAND:
Measure your finished skirt for the waistband. I always measure after I sew the skirt together for the waistband because it seems like regardless of how careful I am, I always loose or add 1/4 inch somewhere.
Cut out waistband fabric. Use length above plus one inch and cut height of 4 inches.
Place right sides together and sew 1/2 inch seam. Make sure to sew 4 inches sides together! Iron seam open.
Sew to skirt with right sides together. Pin all the way around with the seam centered in the back. Sew to skirt with 1/2 inch seam allowance. Go slowly and ensure raw edges stay aligned. (If you don't have the fabric for one long waistband you can cut two equal waistbands just add an extra inch for seam allowances.)
Press seam allowance towards the waist band.
Fold top of waistband down 1/2 inch and press. 
Fold waist band down 1 inch to create a casing that is 1 1/2 inches wide. Press and pin all the way around.
Edge stitch on right side of skirt along waistband. Start on left side seam and stitch across the back of the skirt to stop at the right side seam. This seam should catch the waistband on the inside of the skirt and create a casing for the elastic.
Insert elastic into casing and secure to skirt. Once you have fed the elastic into the casing pull elastic to gather the back of the skirt a bit.  Then sew elastic in place above each side seam using matching thread color to help hide the stitches. (Can try on model prior to securing elastic to ensure fit is correct.  You want the finished waist of the skirt to be the same size as the waist of your model. )
Finish the edge stitch on front of waistband. Start at right side seam, where you stopped previously, and continue to left side. Back stitch to secure stitch.

Pull on the ribbon to create ruching and tie a bow.